Sweet, chewy, and fruity, mango mochi is a tropical twist on a classic dessert. Perfect for summer treats, parties, or a refreshing snack that's both fun and indulgent.
Indulge in the delightful experience of soft and chewy mango mochi. A delectable treat that has the perfect combination of texture and flavor.
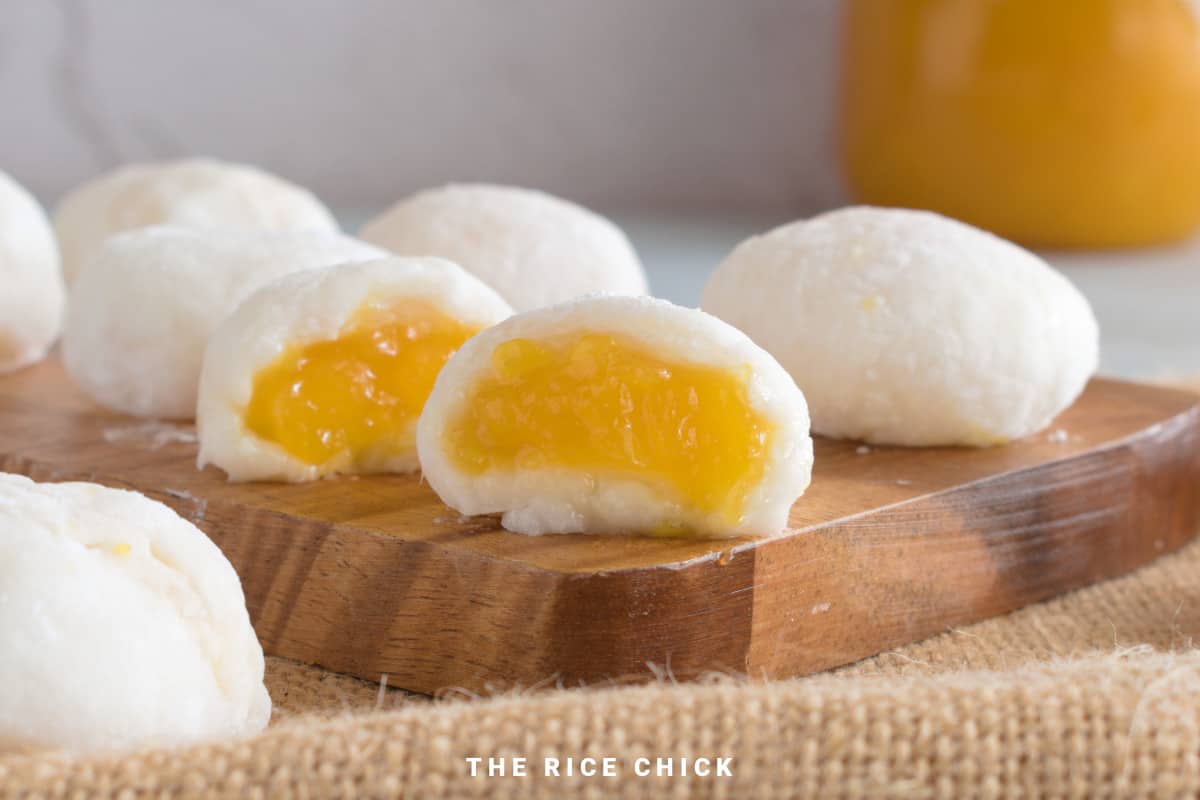
Each bite reveals a burst of refreshing mango, complemented by the subtle sweetness of the mochi dough.
This mango mochi recipe works great as a mouthwatering dessert or snack to satisfy your cravings while remaining light on the palate.
Jump to:
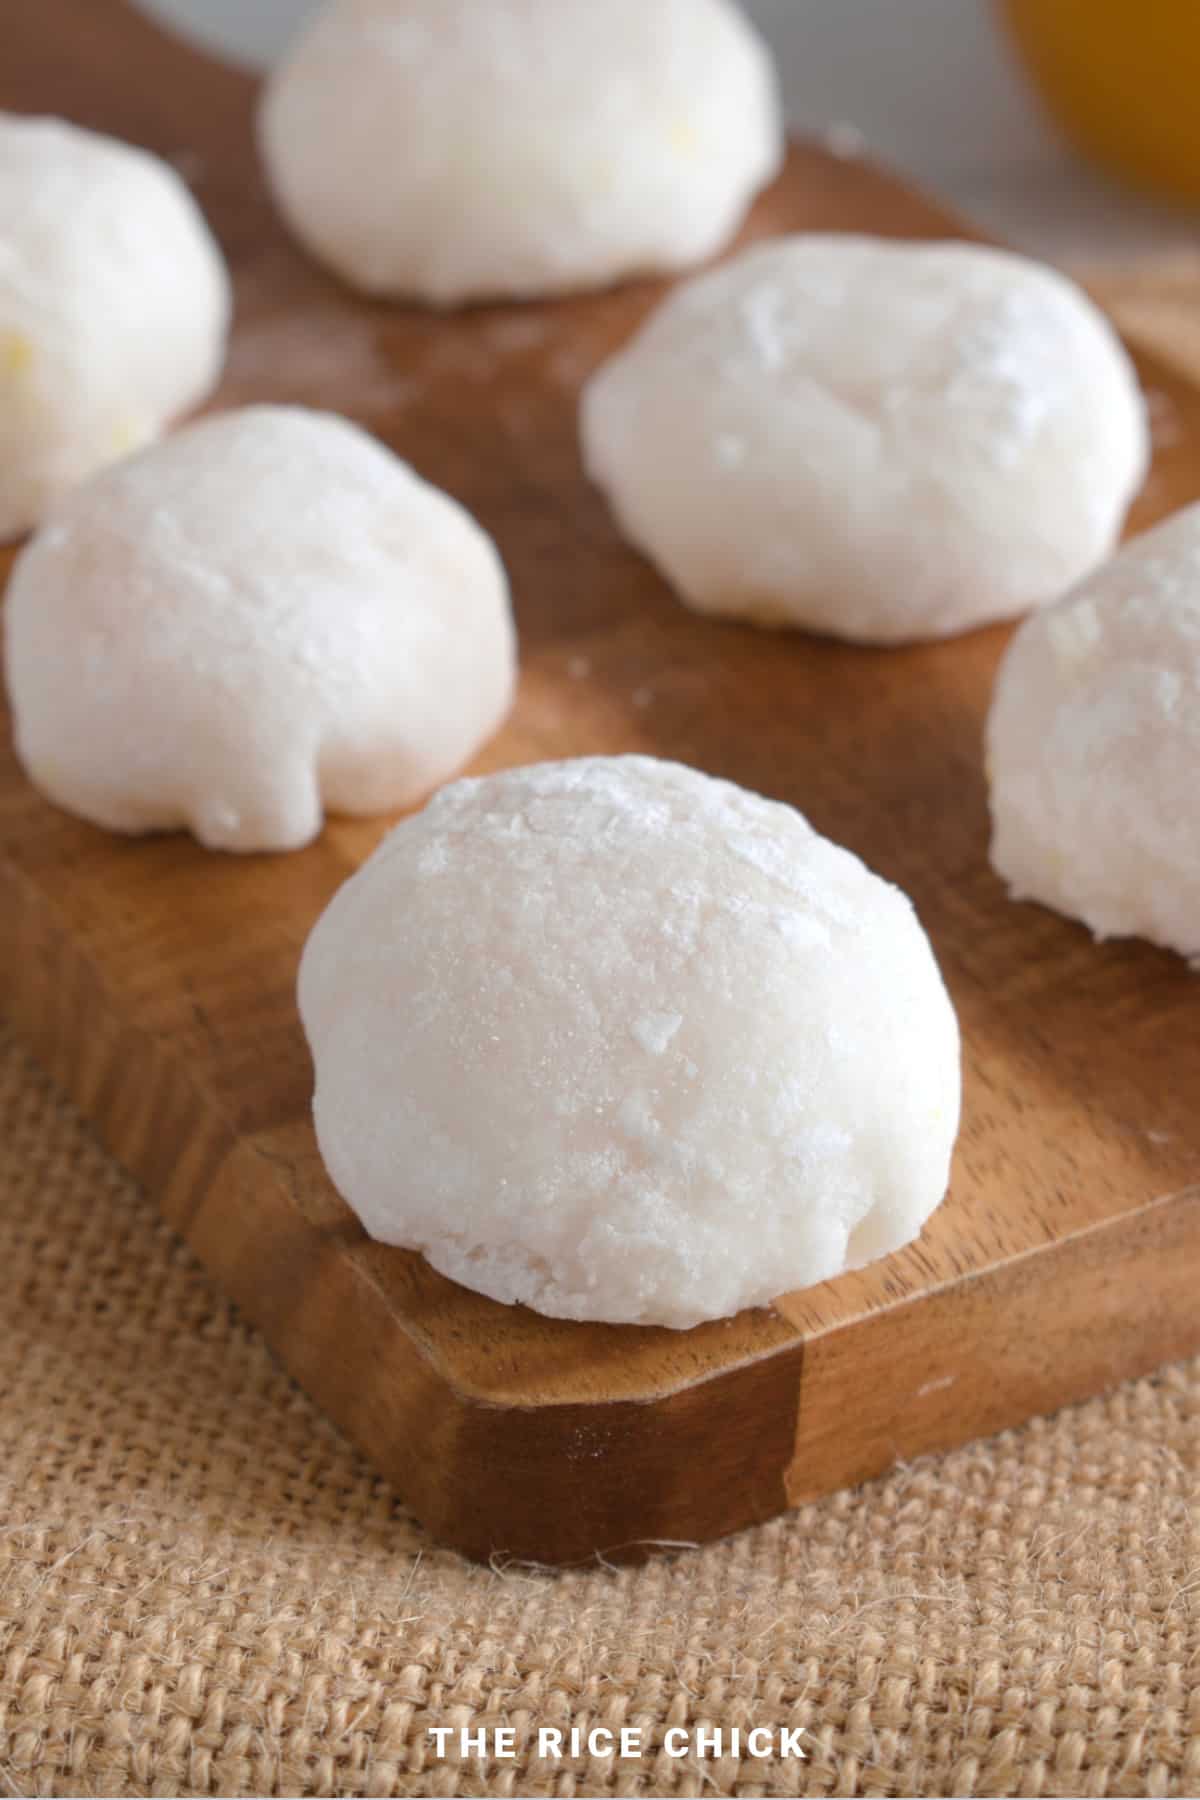
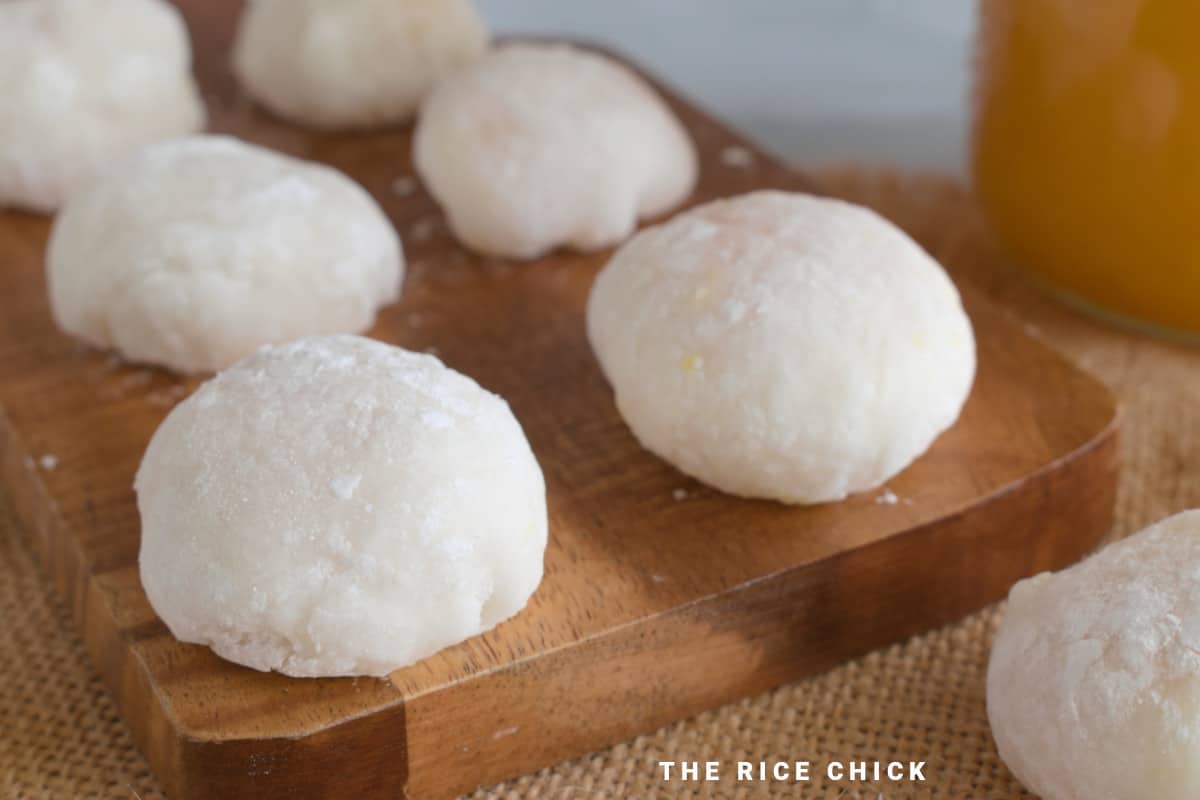
Bite into a delicious Asian dessert that's chewy and soft on the outside, and fruity, and sweet on the inside.
Mango mochi is a variation of the traditional Japanese rice cake, mochi. It's stretchy, soft, and chewy.
Mango mochi combines soft, chewy rice dough with the juicy sweetness of mango for a bright, flavorful dessert. Each bite is tender, slightly sticky, and packed with tropical flavor, making it a delightful treat for any occasion.
This recipe for mango mochi is so easy to make and is great for a sweet treat any time of the day.
Mango mochi is a glutinous rice flour dessert. This recipe uses only 6 ingredients and takes about 25 minute to make!
The dough for this mango mochi is made using the microwave and it is filled with mango jam.
Filling Ideas
This is a simple recipe to make mochi at home. This mango mochi uses mango jam as a filling. You can make your own mango jam or use a store bought one.
Of course, you could even fill these mango mochi with mango ice cream to make ice cream mochi.
Although, if you are using ice cream, you may need to work quickly depending on the weather as your ice cream may melt.
If you are not able to get mango jam or don't want to make any, you can use fresh mango pieces or frozen mangoes.
If you are using frozen mango for your filling, allow the mango pieces to defrost first before use.
If you want to use fresh mango pieces for your filling, cut the mango into bite size pieces before filling the mochi.
Additionally, make sure your mango pieces are not too wet.
If they are, dry them off using a paper towel or absorbent paper before filling your mochi. Otherwise, you could end up with soggy mochi.
What Is Mochi?
Mochi is a small rice cake which originates from Japan. It is made from sweet glutinous rice flour which is also known as mochiko flour.
These rice cakes are soft and chewy. Often they are filled with a variety of different flavors, such as sweet red bean paste, chocolate, or even eaten plain.
Why You'll Love This Recipe
- This is an easy mochi recipe that takes about 25 minutes to make.
- Use the microwave to make the mochi dough, no stovetop required.
- This recipe for mango mochi is dairy free, gluten free, and vegan friendly.
Cost To Make
Estimated cost = $2.05, or $0.15 a mochi
Ingredients
Please note that below is a guide for some of the ingredients we used in the recipe. The printable recipe further down the page has the complete list of ingredients, including quantities and step-by-step instructions.

- Glutinous Rice Flour: Also known as mochiko flour or sweet rice flour.
- Water
- Sugar
- Salt
- Mango Jam: If you are unable to get mango jam, you can use mango pieces to fill your mochi.
- Corn Starch: This will be used to dust your work surface.
Instructions
This mochi mango recipe makes about 12 to 14 mochi.
Step One: In a medium microwave safe bowl, combine the glutinous rice flour, water, sugar, and salt.
Stir until the mixture has no lumps. It can help if you use a whisk to mix through your ingredients.
Step Two: Put the microwave safe bowl on a plate. Cover the bowl with a microwave safe lid and place in the microwave.
Microwave the dough for about 1 minute and 30 seconds to 2 minutes (I used a 850 watt microwave), until the mixture begins to form a paste.
Step Three: Carefully remove the plate and bowl from the microwave and stir the mochi mixture. Be careful when you open the lid as the mixture will be very hot and steamy.

Step Four: Place in the microwave again with the lid on and heat for another 15 - 30 seconds.
Remove from microwave. Stir once more. Allow the dough to cool down until you can comfortably touch it. There should be no more liquid when stirred together.
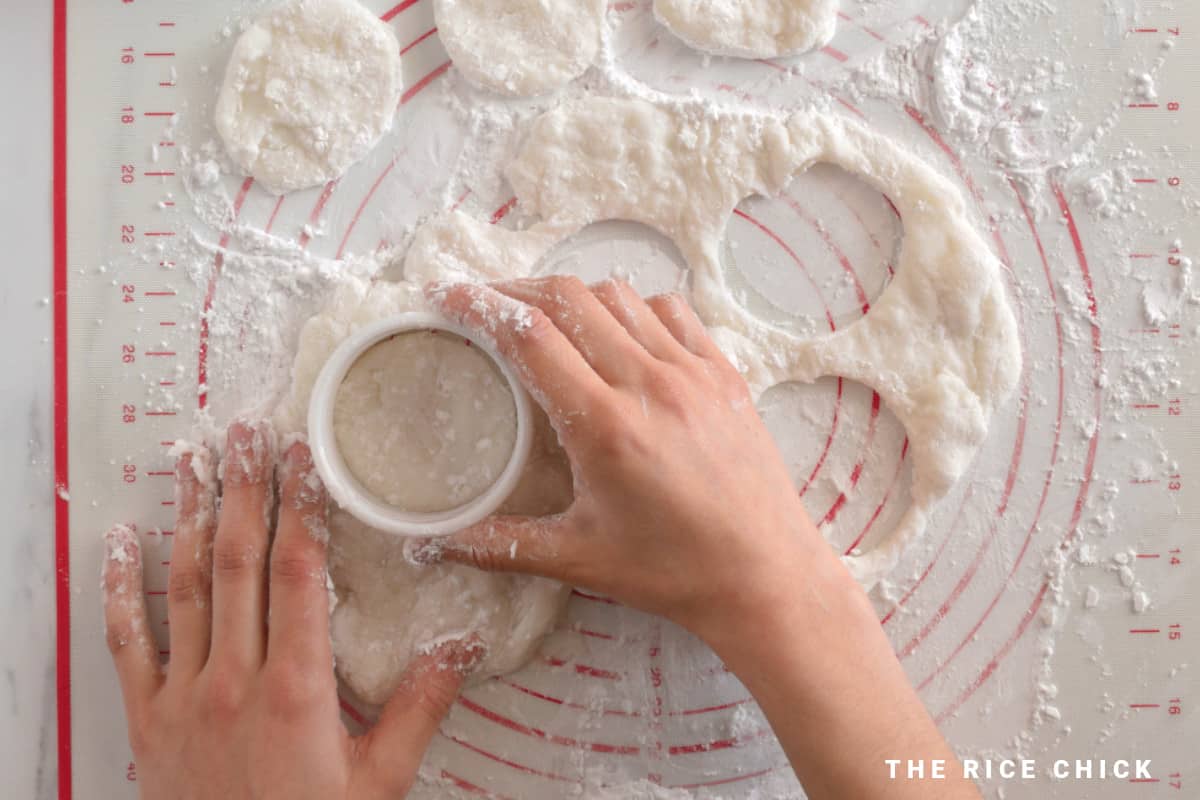
Step Five: Dust your workspace lightly with corn starch. This will prevent the mochi from sticking to the surface when you are rolling the mochi.
Step Six: Flatten the cooled mochi dough into a rectangle which is 0.5 mm (0.02 inches) thick.
Step Seven: Using a 6 cm (2.4 inch) cookie cutter, cut the dough into circles. With any leftover dough, combine it together and make it into another rectangle.
Repeat cutting the dough into circles until the dough is all used up.
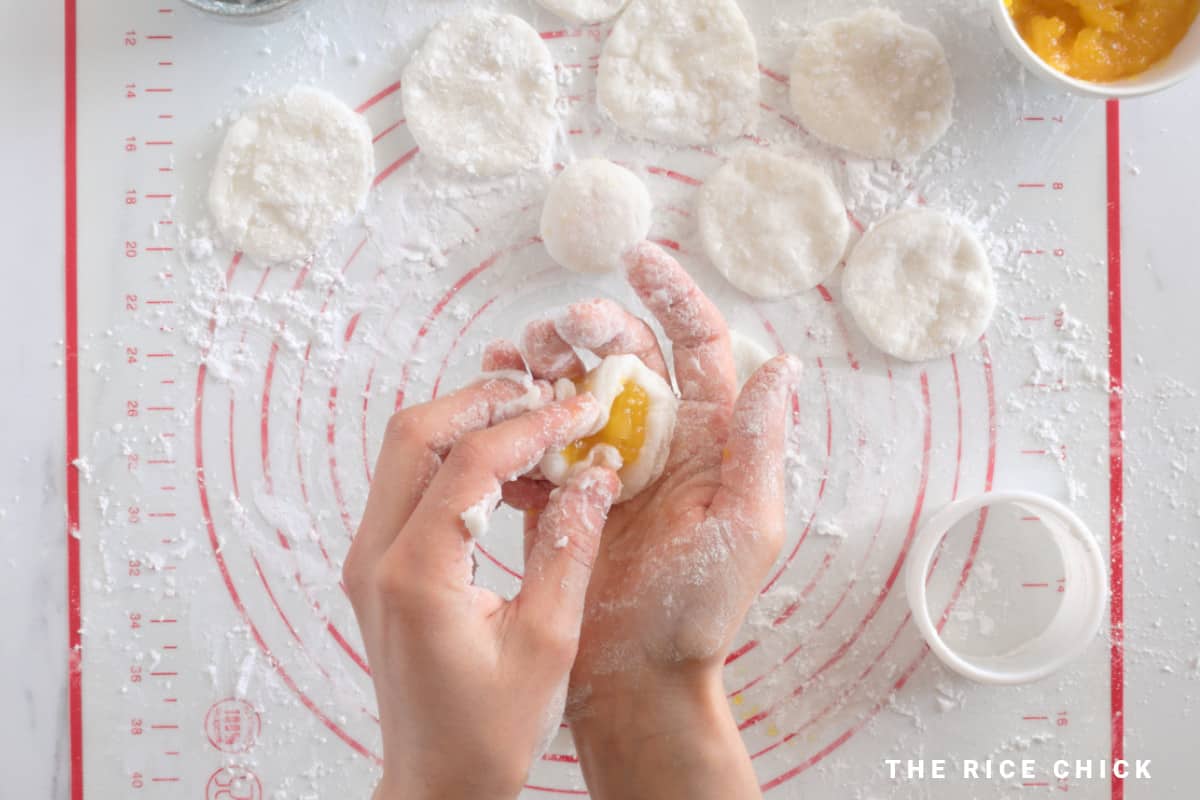
Step Eight: In the center of each circle, fill with ½ to 1 teaspoon of mango jam. Fold the sides of the circle into the middle and pinch together to close the dough. Repeat for all balls.
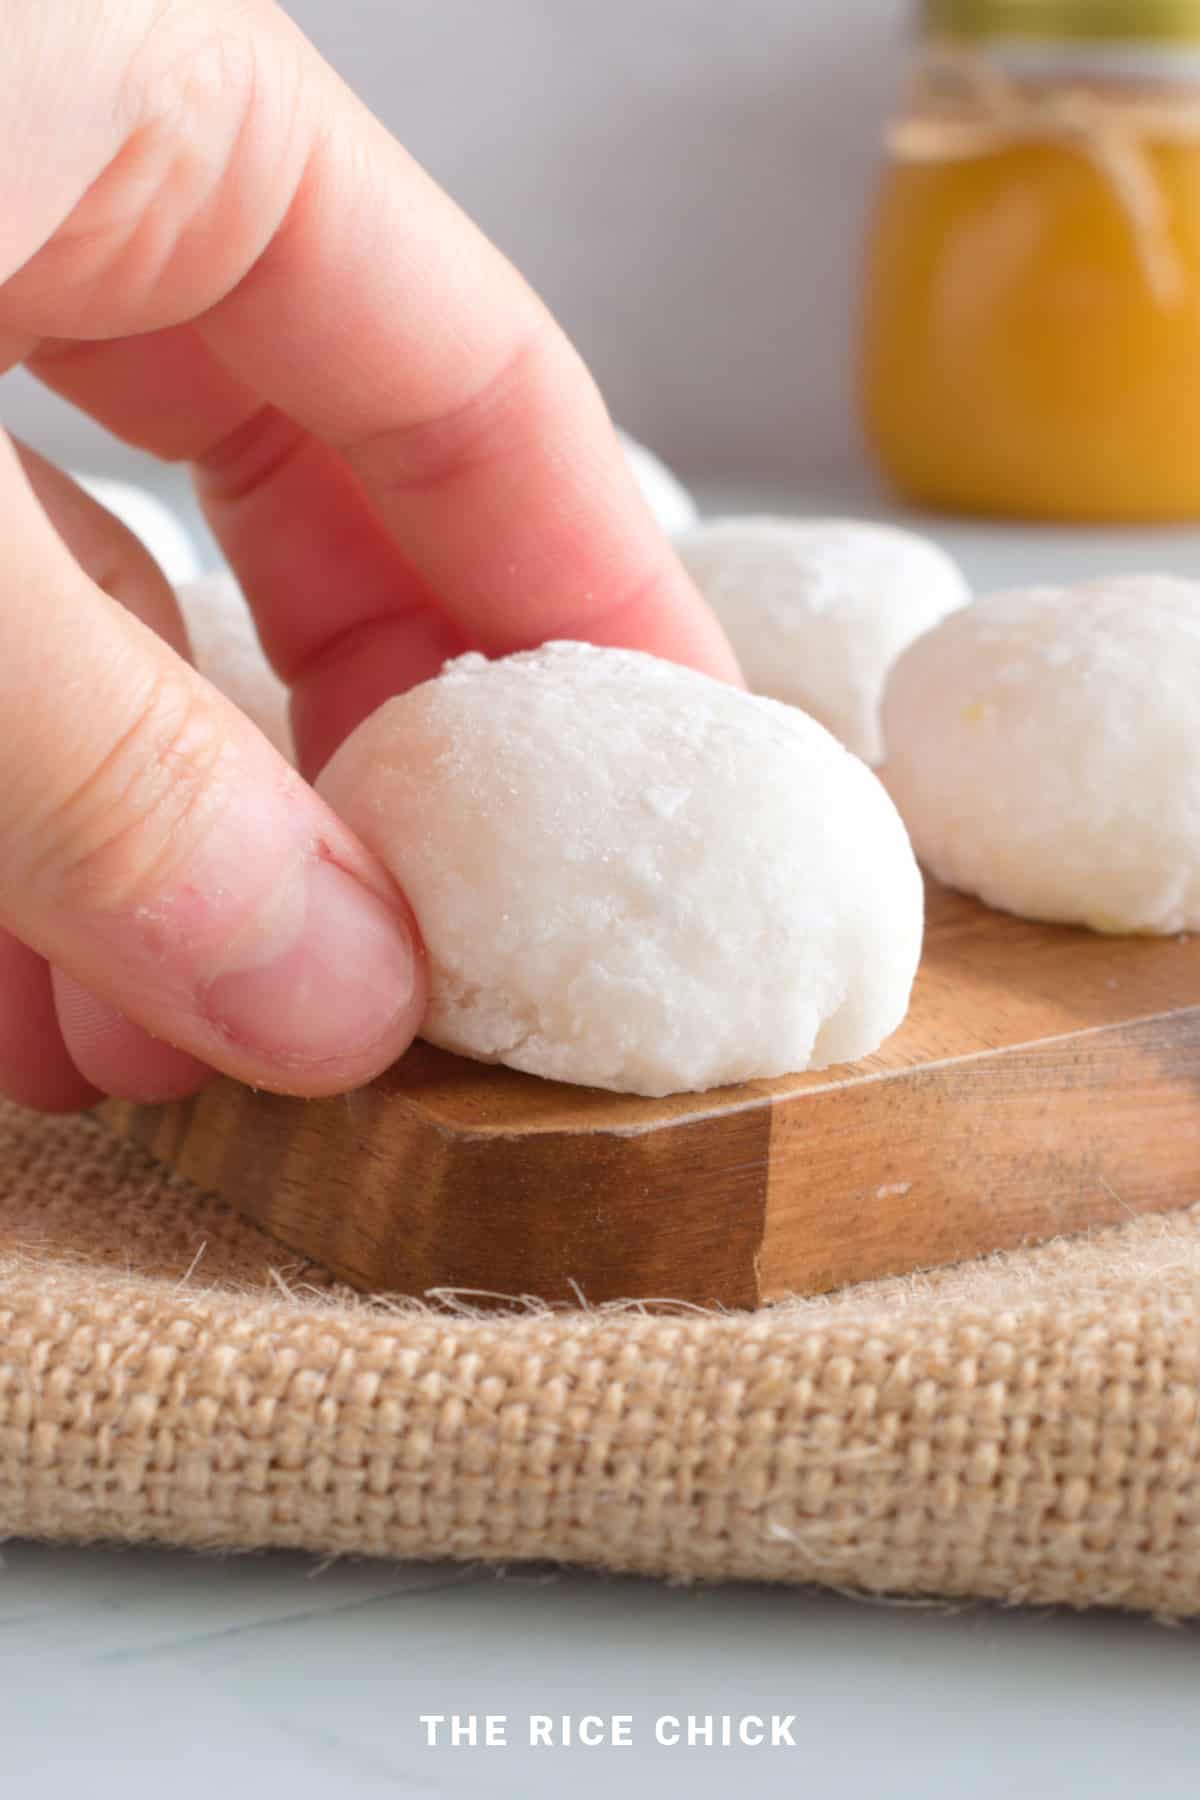
Step Nine: Coat each mochi lightly with some corn starch. This will help them to not stick to each other when you store them or serve them. Place seam side down and serve.
Tips for Success
If you find the mochi dough is sticking too much to your hands, coat your hands with corn starch. This will help prevent the dough from sticking to your hands.
Substitutions / Variations
You could add a drop or two of yellow food coloring to your mochi dough before you make it. This way you'll end up with a yellow colored dough.
Serving Suggestions
This mango mochi makes 12 to 14 pieces.
Mango mochi is great to serve for morning tea, afternoon tea, special occasions like Christmas or Easter, and even as a light dessert.
Storage
Store these mango mochi in an air tight container at room temperature for 2 to 3 days.
Alternatively, you can store them in an air tight container in the fridge for 1 to 2 days. In the fridge, the mochi usually dry out quicker.
FAQ
No, glutinous rice flour is not the same as rice flour. Glutinous rice flour is also known as sweet rice flour or mochiko flour. It is made from glutinous rice which is more starchy and stickier than the rice used to make rice flour.
No, you cannot substitute mochiko for plain rice flour or all purpose flour. This is because they will not provide the same texture as using mochiko flour. This is because mochiko flour is made from glutinous rice which becomes chewy when cooked.
Other Rice Cake Recipes
If you love rice cakes as much as we do, you might like to try some of our favorites like milk rice cake, ube butter mochi, rice cake toppings, potato mochi, mango mochi, jajang tteokbokki, chocolate mochi, reindeer Christmas rice cakes, Nutella mochi, and Asian rice cakes.
Made this recipe? Let us know how it went in the comments below! We'd love to hear how it turned out.
More Sweet Recipes
- Matcha Cookies
- Rice Bubble Marshmallow Slice
- Milk Rice Cake
- Mochi Cookies
- Nutella Mochi
- Arroz Doce
- Ube Baked Mochi Donuts
- Dairy Free Chocolate Chip Muffins
- Chocolate Peanut Butter Rice Krispie Treats
- Rice Flour Pancakes
- Banana Cinnamon Baked Rice Flakes
- Ube Butter Mochi
Recipe

Mango Mochi
Ingredients
- 100 grams (3.53 ounces) glutinous rice flour (mochiko flour, sweet rice flour)
- 180 ml water
- 50 grams (1.76 ounces) white sugar
- Pinch of salt
- 130 grams (4.59 ounces) of mango jam
- Corn starch to dust work surface
Instructions
- In a medium microwave safe bowl, combine the glutinous rice flour, water, sugar, and salt. Stir until the mixture has no lumps.
- Put the microwave safe bowl on a plate. Cover the bowl with a microwave safe lid and place in the microwave. Microwave the dough for about 1 minute and 30 seconds to 2 minutes (I used a 850 watt microwave), until the mixture begins to form a paste.
- Carefully remove the plate and bowl from the microwave and stir the mixture. Be careful when you open the lid as the mixture will be very hot and steamy.
- Place in the microwave again with the lid on and heat for another 15 - 30 seconds. Remove from microwave. Stir once more. Allow the dough to cool down until you can comfortably touch it. There should be no more liquid when stirred together.
- Dust your workspace lightly with corn starch. This will prevent the mochi from sticking to the surface when you are rolling the mochi.
- Flatten the cooled mochi dough into a rectangle which is 0.5 mm (0.0197 inches) thick.
- Using a 6 cm (2.4 inch) cookie cutter, cut the dough into circles. With any leftover dough, combine it together and make it into another rectangle. Repeat cutting the dough into circles until the dough is all used up.
- In the center of each circle, fill with ½ to 1 teaspoon of mango jam. Fold the sides of the circle into the middle and pinch together to close the dough. Repeat for all balls.
- Coat each mochi lightly with some corn starch. This will help them to not stick to each other when you store them or serve them. Place seam side down and serve.
Notes
- After mixing your mochi dough, soak your bowl in water immediately. This will make it easier to clean.
- If you find the mochi dough is sticking too much to your hands, coat your hands with corn starch. This will help prevent the dough from sticking to your hands.


Caleb says
These are so delicious, I made them yesterday.