Indulge in the irresistible pleasure of these delectable condensed milk brownies, boasting a delightful combination of gooey, chewy, and crunchy textures.
Whether you're seeking a sweet finale to a meal or planning a picnic, these brownies serve as the ideal treat to satisfy your cravings.

Jump to:
Get ready for an amazing brownie recipe that you'll absolutely love! These condensed milk brownies are super special because they're soft on the inside, like a chocolate hug, and they have a crispy and crunchy outside.
It's the best of both worlds!
These brownies with condensed milk can be made in advance.
This makes them perfect if you are short on time or want to prepare a sweet treat ahead of time.
Or, if you're like me, and you want to have a little dessert which you can pull out of the freezer for yourself or perhaps some unexpected guests.
The condensed milk acts as both the main liquid and sweetness of the brownie.
For this recipe, I used condensed milk that was made from rice milk. Personally, I love the flavor that rice condensed milk gives to the brownie.
However, you can use any kind of condensed milk you would like.
A Brief History of Brownies
There are many different stories to where and how the brownie originated.
One of the most commonly known stories of origin dates back to the 1800s in the United States of America.
It is said that Bertha Palmer, wife to the owner of Palmer House Hotel, commissioned a pastry chef to make a dessert for the Chicago World's Columbian Exposition in 1893.
Why You'll Love This Recipe
- These brownies are no fuss and don't even need much effort.
- This brownie can be a snack, dessert, or even comfort food!
- You can make this in advance if you are preparing for a dinner party, morning or afternoon tea.
- This condensed milk brownies recipe is vegan friendly.
- This recipe for brownies with condensed milk is budget friendly.
Cost To Make
Estimated cost = $7.60, or $0.63 a slice
Ingredients
Please note that below is a guide for some of the ingredients we used in the recipe. The printable recipe further down the page has the complete list of ingredients, including quantities and step-by-step instructions.

- Self raising flour
- Cocoa powder
- Caster sugar
- Sea salt
- Sunflower oil (or vegetable oil)
- Vanilla extract
- Plant based milk unsweetened, room temperature
- Plant based condensed milk alternative
- Dairy free dark chocolate, chopped into small chunks
- Chopped almonds (or walnuts/pistachios)
Instructions
The process to making these delicious brownies is so simple. What's more is this recipe makes 12 slices which are 5.08 cm x 5.08 cm (2 inches x 2 inches) in size.
Step One: Grease and line a 22 cm (8.66 inches) brownie tin with parchment paper and vegetable oil.
Step Two: Preheat oven to 160°C (320°F)(fan forced), or 180°C (356°F) non-fan forced oven.
Step Three: Place the self-raising flour, cocoa powder, caster sugar, and salt in a large bowl. Mix until combined.
Step Four: Place wet ingredients vegetable oil, vanilla extract, milk, condensed milk in a separate large to medium bowl. Mix well.
Step Five: Melt the dark chocolate in the microwave in short bursts. Make sure to stir the chocolate between stopping the microwave.
Allow chocolate to cool slightly but not so that it becomes solid.
Step Six: Add melted chocolate to the wet ingredients. Mix until combined.
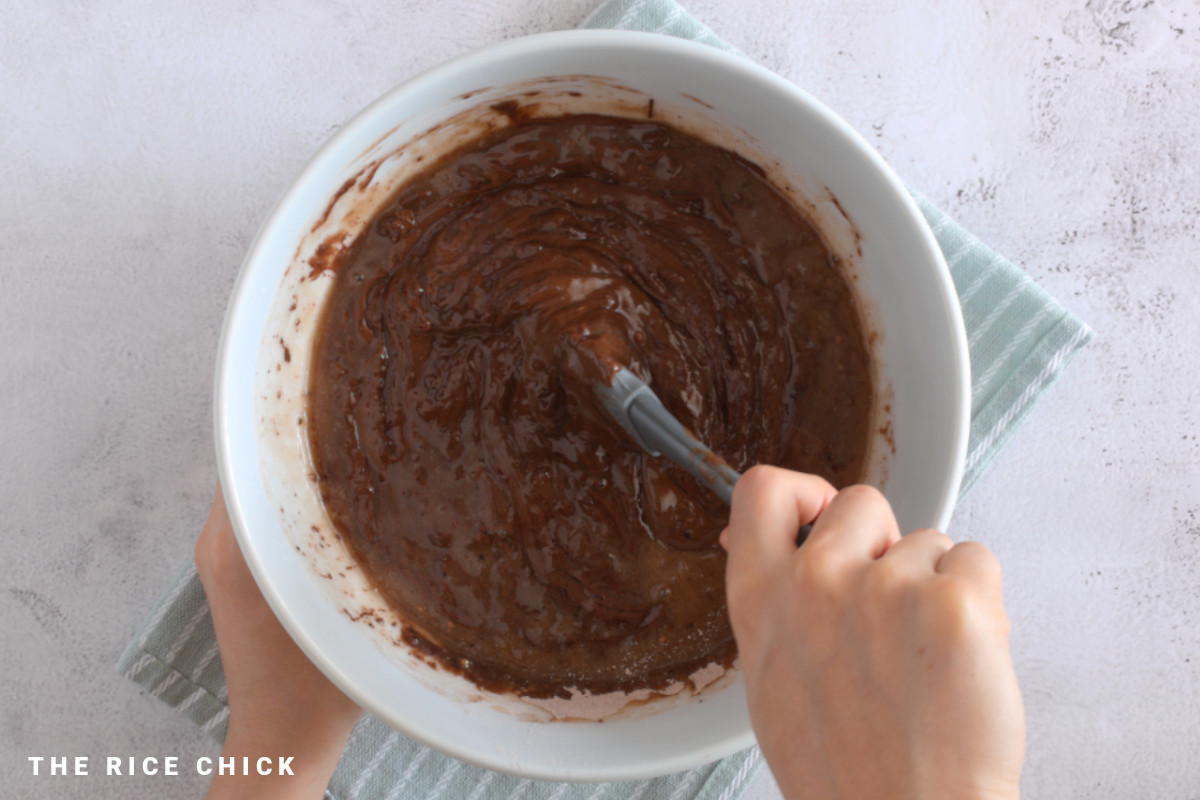
Step Seven: Add the wet mixture to the dry ingredients and mix until combined. Do not over mix.
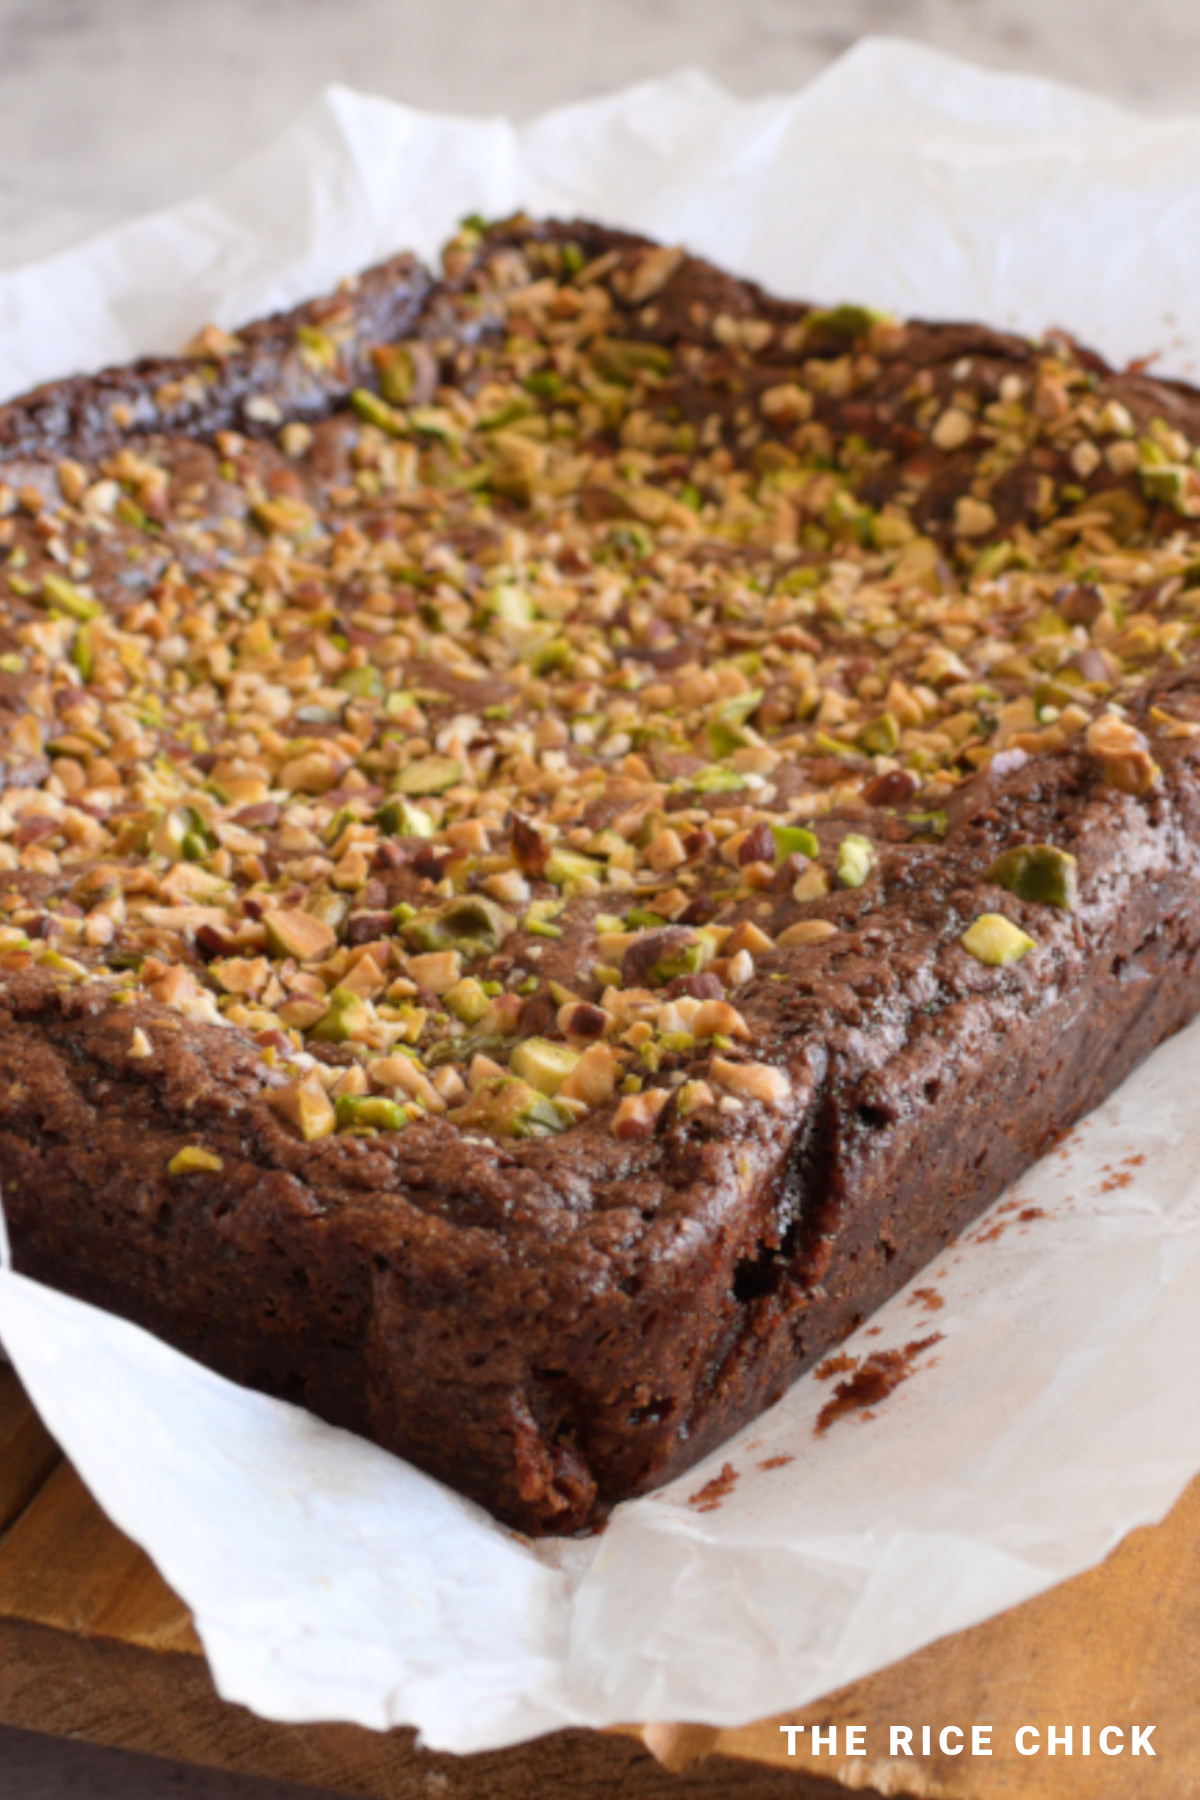
Step Eight: Place mixture in the prepared tin and flatten the top. It can help to gently tap the tin on the worksurface to flatten the top.
Step Nine: Add the chopped nuts on top if desired.
Step Ten: Bake for 35-40 minutes or until the brownie is cooked in the centre. You can test this by carefully poking a knife in the centre of the brownie.
The brownie should have a moist crumb it should not have the same consistency as the wet batter.
Step Eleven: Allow the brownie to cool in the tin for 10 minutes, then remove from tin and transfer to a wire rack. Serve.
Tips for Success
- The brownie will double in size. If you have a shallow tin, raise the sides with some foil.
- If it looks like it is going too brown on top but it is not yet cooked, carefully place some foil loosely on the top of the brownie.

Serving Suggestions
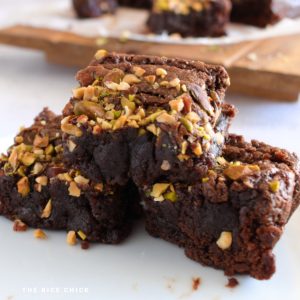
Enjoy condensed milk brownies hot or cold with a scoop of vanilla ice cream or even custard or whipped cream.
Personally, I love to eat these brownies heated up with a scoop of vanilla ice cream and some extra chopped nuts sprinkled on top.
They are also perfect with a hot cup of tea or coffee.
Storage
These brownies can be stored in an air tight container in the fridge for up to 7 days.
They can also be frozen. To defrost the brownies, allow them to come to room temperature overnight, or reheat them in the microwave.
FAQ
You most certainly can! These brownies with condensed milk can be made days in advance and kept in an air tight container in the fridge.
You can even freeze the brownies too. Bring the brownies to room temperature either by defrosting them in the microwave or leaving them to defrost overnight.
Brownies which have more chocolate and butter are generally more fudgy than those without.
This is because they have a greater fat to flour ratio. Brownies which have a lower fat to flour ratio can be more cakey in texture.
Made this recipe? Let us know how it went in the comments below! We'd love to hear how it turned out.
More Sweet Recipes
- Rice Bubble Marshmallow Slice
- Ube Mochi
- Rice Pudding with Oat Milk
- Arroz Doce
- Mochi Cookies
- Nutella Mochi
- Matcha Baked Mochi Donuts
- Rice Flour Pancakes
- Matcha Cookies
- Ube Butter Mochi
- Milk Rice Cake
- Mochi Waffles
- Mango Mochi
- Dairy Free Chocolate Chip Muffins
- Chak Hao Kheer
Recipe
Condensed Milk Brownies
Ingredients
- 170 grams (6 ounces) self raising flour
- 3 tablespoons cocoa powder
- 100 grams (3.53 ounces) caster sugar
- ¼ teaspoon sea salt
- 5 tablespoons (60 grams, 2.12 ounces) sunflower oil or vegetable oil, plus extra for greasing
- 1 teaspoon vanilla extract
- 6 tablespoons unsweetened plant based milk room temperature
- 370 grams (13.05 ounces) plant based condensed milk alternative
- 150 grams (5.29 ounces) dairy free dark chocolate chopped into small chunks
- 40 grams (1.41 ounces) chopped almonds or walnuts / pistachios
Instructions
- Grease and line a 22 cm (8.66 inches) brownie tin with parchment paper and vegetable oil.
- Preheat oven to 160°C (320°F)(fan forced), or 180°C (356°F) non-fan forced oven.
- Place the self-raising flour, cocoa powder, caster sugar, and salt in a large bowl. Mix until combined.
- Place wet ingredients vegetable oil, vanilla extract, milk, condensed milk in a separate large to medium bowl. Mix well.
- Melt the dark chocolate in the microwave in short bursts. Make sure to stir the chocolate between stopping the microwave. Allow the chocolate to cool slightly but not so that it becomes solid.
- Add melted chocolate to the wet ingredients. Mix until combined.
- Add the wet mixture to the dry ingredients and mix until combined. Do not over mix.
- Place mixture in the prepared tin and flatten the top. It can help to gently tap the tin on the worksurface to flatten the top.
- Add the chopped nuts on top if desired.
- Bake for 35-40 minutes or until the brownie is cooked in the centre. You can test this by carefully poking a knife in the centre of the brownie. The brownie should have a moist crumb it should not have the same consistency as the wet batter.
- Allow the brownie to cool in the tin for 10 minutes, then remove from tin and transfer to a wire rack. Serve.
Notes
- The brownie will double in size. If you have a shallow tin, raise the sides with some foil.
- If it looks like it is going too brown on top but it is not yet cooked, carefully place some foil loosely on the top of the brownie.


Mary says
I made this yesterday, will be making again. Thanks
Frankie says
I made these for an afternoon tea, everyone loved them, they are so nice and chewy.