Experience the delightful simplicity of onigiri with tuna - perfectly seasoned sushi rice enveloping savory canned tuna, shaped into triangles or rounds.
Enjoy them plain, wrapped in nori, or coated in sesame seeds for added crunch. Ideal for lunch boxes, quick snacks, or adding Japanese flair to celebrations.
Prepare ahead for convenience and savor the taste of Japan wherever you go with onigiri with tuna.

Jump to:
If you're craving a taste of Japan without the fuss, onigiri with canned tuna is your go-to choice.
These delightful rice balls combine simplicity with a burst of flavor, perfect for any occasion.
Onigiri with tuna is incredibly versatile. Serve it as a quick and satisfying snack, ideal for lunch boxes or picnics.
Its portable nature makes it perfect for on-the-go meals or a quick bite during busy days.
For special occasions like celebrations or gatherings like Christmas or Easter, onigiri with tuna is perfect to serve - whether it be as an appetizer, finger food, or even a side dish.
Pair it with other Japanese dishes for a complete meal experience, or feature it as part of a buffet-style spread.
Prepare a batch ahead of time for meal prep. Store the onigiri tightly wrapped in plastic wrap or in an airtight container in the refrigerator.
This ensures they stay fresh and ready to enjoy throughout the week. Simply grab one when hunger strikes or pack them for a delicious lunch option.

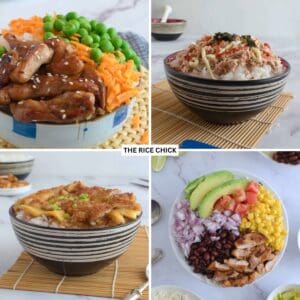
Other delicious and easy to make sushi recipe you might like to try include: Hosomaki Oshinko. Canned Tuna Sushi, Chicken Rice Balls, Hosomaki or Spicy Salmon Sushi Bake.
What is onigiri?
Onigiri, also known as omusubi, is a traditional Japanese rice ball made from sushi rice seasoned with vinegar, salt, and sugar.
It is typically shaped into triangles or rounds, often with a filling such as grilled salmon, pickled plum (umeboshi), or tuna.
Onigiri is commonly wrapped in seaweed (nori), which adds flavor and helps hold the rice ball together, making it a convenient and portable snack or meal.
How to shape onigiri?
Shaping onigiri can be accomplished either manually or using a mold, with another popular technique involving the use of plastic wrap.
When shaping by hand, lightly moisten your hands to prevent the rice from sticking. Take a handful of slightly warm sushi rice and gently compress it into a firm ball or triangle shape between your palms to ensure it holds together securely.
Using an onigiri mold simplifies the shaping process and ensures uniformity. Fill the mold with sushi rice, press firmly, add your preferred filling, cover with more rice, and press again before removing the mold.
Alternatively, plastic wrap can also be used to shape onigiri effectively, particularly without a mold.
Place a sheet of plastic wrap on your palm, place a portion of rice, create a well in the center for the filling, encase it with more rice, then twist the wrap to form a tidy triangle or ball.
This method helps maintain the shape and prevents sticking, resulting in a neat presentation.
Why You'll Love This Recipe
- Quick and Easy: Ready in minutes with simple ingredients.
- Customizable: Endless filling options like tuna, salmon, or pickled plum.
- Portable: Perfect for lunches, picnics, or snacks on the go.
- Versatile: Enjoy hot or cold, plain or wrapped in nori.
- Kid-Friendly: Fun to shape and eat, appealing to all ages.
- You can omit the spice (sriracha) if you want, or make it even hotter - this is what makes this recipe so good.
Cost To Make
Estimated cost = $4.35 or $1.08 a serve
Ingredients
Please note that below is a guide for some of the ingredients we used in the recipe. The printable recipe further down the page has the complete list of ingredients, including quantities and step-by-step instructions.

For the Rice
- Sushi Rice: This is a type of short grain rice.
- Water
- Sushi Vinegar
- Caser Sugar: Or super fine sugar.
- Salt
For the Filling
- Canned Tuna: Drained.
- Japanese Manonnaise
- Sriracha Sauce: Optional.
- Light Soy Sauce
- Green Onions (Spring Onions): Finely chopped.
- Salt
Optional Toppings
- Nori Sheets (Seaweed Sheets): Cut into small rectangles about the size of your onigiri. This could be used to wrap your onigiri.
- Sesame Seeds: Lightly toasted. You could use a mix of black sesame seeds and white sesame seeds.
- Japanese Mayonnaise
- Light Soy Sauce
- Wasabi
Instructions
This recipe for onigiri with tuna serves about 4. The ingredient quantities can easily be adjusted to suit how many serves you need to make.
For the Rice
Step One: Rinse your rice under water until the water runs clear. This could take about 2 to 3 rinses. Completely drain the rice and then place in a saucepan.
Step Two: Add the water to the saucepan and bring the water to a boil over medium to high heat.
Step Three: Once at a boil, reduce the heat to low, gently stir, and cover with a lid. Cook for 15 minutes.
Step Four: Remove from heat and allow to rest for 15 minutes covered.
Step Five: Transfer the rice to a glass mixing bowl. Break up the rice using a wooden spoon and gently mix through the vinegar, sugar, and salt. Allow the rice to cool completely. Once cool, cover with a damp tea towel and place in the fridge for 5 to 10 minutes.
For the Filling
Step One: In a mixing bowl, combine the drained canned tuna, Japanese mayonnaise, Sriracha sauce (if using), soy sauce, chopped green onions, and salt to taste. Set aside.

Putting It All Together
Step One: Lightly wet your hands with water. Scoop 1 ½ tablespoons of rice and shape into a ball. Repeat until all the rice has been used up.
Step Two: Once you have shaped all the rice, take one rice ball and gently flatten. Add about 1 teaspoon (5 grams, 0.176 ounces) of tuna mixture in the centre of the flattened rice ball. Do not overfill. Cover the tuna in rice.

Step Three: Repeat step 2 until all the filling has been used up.
Step Four: Serve rice balls as is, or wrap each rice ball with a bit of cut nori sheet, and sprinkle with some lightly toasted sesame seeds.
Tips for Success
- When seasoning your sushi rice avoid using any metal. This is because metal reacts with vinegar and you will find that your rice may end up with a metallic taste through it. Instead use a glass bowl and a wood or plastic mixing spoon.

Serving Suggestions
Here are some ways you might like to serve this recipe for tuna onigiri:
- Lunch Boxes: Pack for school or work lunches.
- Picnics: Ideal for outdoor dining with family and friends.
- Party Appetizers: Serve as part of a Japanese-themed party spread.
- Bento Boxes: Pair with sushi rolls and salads for a complete meal.
- Quick Snack: Enjoy on its own for a satisfying pick-me-up.
- Special Occasions: Add to holiday platters for a unique touch.
Storage
Store leftover onigiri in an airtight container in the refrigerator for up to two days. Reheat briefly in the microwave or enjoy cold as a convenient snack.
FAQ
A neutral flavored canned tuna is best for onigiri.
The canned tuna could be in water, brine or oil. Be sure to drain your tune before you use it.
Tuna mayo onigiri can be stored in an airtight container in the refrigerator for up to two days.
Ensure it is properly sealed to maintain freshness. Reheat briefly in the microwave or enjoy cold as a convenient snack.
Popular fillings for onigiri include canned tuna with Japanese mayo, grilled salmon, pickled plum (umeboshi), or seasoned seaweed (nori).
These fillings add variety and enhance the flavor of the sushi rice, making each bite a delicious experience.
What rice is used for what?
Ever wondered which might be the best rice to use for a dish you're about to make.
Or maybe you're just curious and want to know more about rice in general.
Why not check out our pages on what is basmati rice and what is jasmine rice.
Helpful Rice Cooking Tips
Want to know how to cook rice or just need a little refresher?
Check out how to easily cook basmati rice, sushi rice, and jasmine rice on the stovetop.
Or, why not check out our recipes on how to make basmati rice, jasmine rice, and sushi rice in the Instant Pot.

Made this recipe? Let us know how it went in the comments below! We'd love to hear how it turned out.
Recipe

Onigiri With Tuna
Ingredients
For the Rice
- 1 cup (200 grams, 7.05 ounces) uncooked sushi (short grain) rice
- 1 ½ cups water
- 2 tablespoons sushi vinegar
- 2 teaspoons caster sugar super fine sugar
- ½ teaspoon salt
For the Filling
- 335 grams (11.82 ounces) canned tuna, drained
- 80 grams (2.82 ounces) Japanese mayonnaise
- 2 teaspoons Sriracha sauce or to taste optional
- 2 teaspoons soy sauce
- ½ cup (40 grams, 1.41 ounces) green (spring) onions finely chopped, plus extra to garnish
- Salt to taste
Optional Toppings
- 3 nori sheets seaweed sheets cut into small rectangles
- Sesame seeds lightly toasted
- Japanese mayonnaise
- Light soy sauce
- Wasabi
Instructions
For the Rice
- Rinse your rice under water until the water runs clear. This could take about 2 to 3 rinses.. Completely drain the rice and then place in a saucepan.
- Add the water to the saucepan and bring the water to a boil over medium to high heat.
- Once at a boil, reduce the heat to low, gently stir, and cover with a lid. Cook for 15 minutes.
- Remove from heat and allow to rest for 15 minutes covered.
- Transfer the rice to a glass mixing bowl. Break up the rice using a wooden spoon and gently mix through the vinegar, sugar, and salt. Allow the rice to cool completely. Once cool, cover with a damp tea towel and place in the fridge for 5 to 10 minutes.
For the Filling
- In a mixing bowl, combine the drained canned tuna, Japanese mayonnaise, Sriracha sauce (if using), soy sauce, chopped green onions, and salt to taste. Set aside.
Putting It All Together
- Lightly wet your hands with water. Scoop 1 ½ tablespoons of rice and shape into a ball. Repeat until all the rice has been used up.
- Once you have shaped all the rice, take one rice ball and gently flatten. Add about 1 teaspoon (5 grams, 0.176 ounces) of tuna mixture in the centre of the flattened rice ball. Do not overfill. Cover the tuna in rice.
- Repeat step 2 until all the filling has been used up.
- Serve rice balls as is, or wrap each rice ball with a bit of cut nori sheet, and sprinkle with some lightly toasted sesame seeds.
Notes
- To shape onigiri using a mould, fill the mould halfway with rice, add the tuna filling, cover with more rice, press firmly with the lid, and gently release the shaped onigiri.
- For plastic wrap, place a handful of rice on the wrap, add the filling, gather and twist the wrap to form a tight ball, shape it into a triangle with your hands, and then unwrap.


Comments
No Comments